10 Free Web Development Tools Every Developer Should Know
Discover useful free web development tools that can help you format JSON, create code screenshots, optimize images, test websites, write CSS, and handle everyday development tasks faster.
Web development involves much more than writing code. Every day, developers need to format JSON, check browser compatibility, optimize images, test responsive layouts, inspect websites, and solve many other small problems.
The good news is that you do not need to install a separate application for every task. There are many free web development tools available online that can save time and make your workflow easier.
In this guide, we have collected 10 free web development tools that are useful for both beginners and experienced developers. Some are simple browser utilities, while others are popular tools used by developers every day.
Whether you are building your first website or working on a production project, these tools are worth keeping in your developer toolkit.
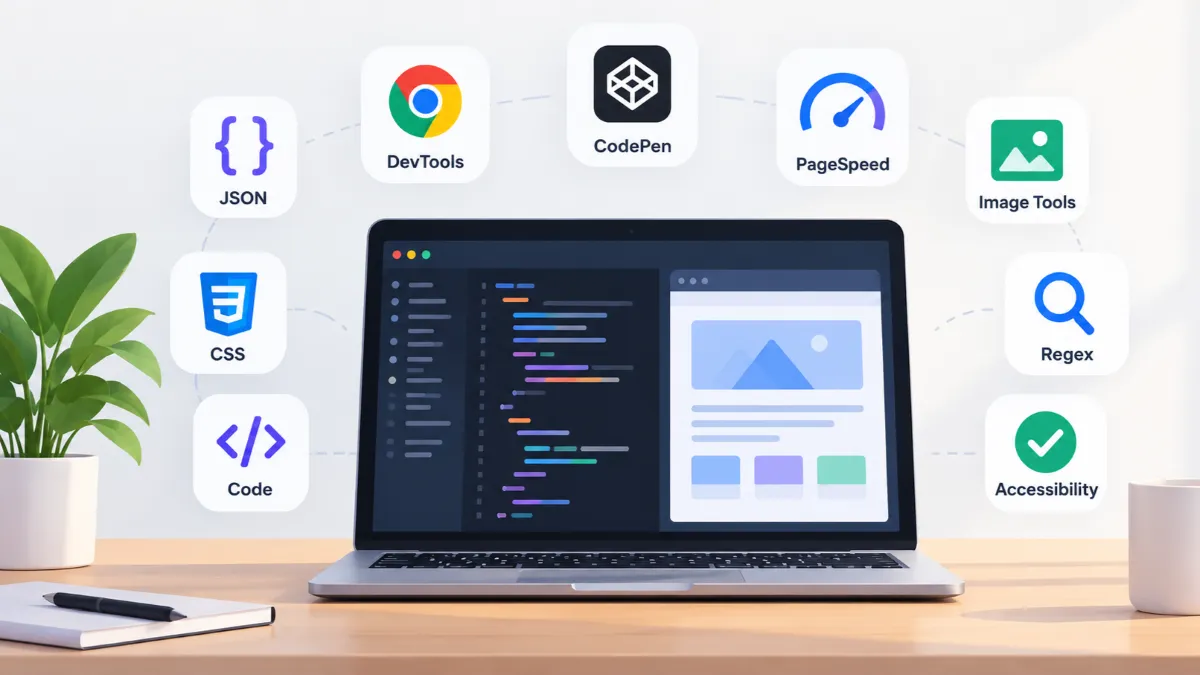
Quick Overview
| Tool | Best For | Free |
|---|---|---|
| JSON Formatter | Formatting and reading JSON | Yes |
| Chrome DevTools | Inspecting and debugging websites | Yes |
| Code to Image | Creating code screenshots | Yes |
| PageSpeed Insights | Checking website performance | Yes |
| CodePen | Testing HTML, CSS, and JavaScript | Yes |
| Image Compressor | Reducing image file size | Yes |
| Can I Use | Checking browser compatibility | Yes |
| 100 CSS Shadows | Finding CSS shadow styles | Yes |
| Regex101 | Testing regular expressions | Yes |
| WebAIM Contrast Checker | Checking color accessibility | Yes |
1. JSON Formatter
JSON is used everywhere in modern web development. APIs, databases, configuration files, and many web applications use JSON to exchange or store data. The problem is that JSON can become difficult to read when it is returned as one long line or contains deeply nested objects.
A JSON formatter makes this data easier to understand by adding indentation, spacing, and a clear structure. This is especially useful when you are working with API responses or debugging data.
Why developers use a JSON formatter
- ✓Make minified or messy JSON easier to read
- ✓Understand nested objects and arrays
- ✓Inspect API responses more easily
- ✓Spot formatting and syntax problems
- ✓Quickly format JSON without installing software
Example: Turn messy JSON into readable data
Imagine receiving an API response like this:
{"name":"John","age":28,"skills":["HTML","CSS","JavaScript"],"address":{"city":"New York","country":"USA"}}Although the JSON above is valid, it is not very comfortable to read. After formatting, the same data becomes much easier to understand:
{
  "name": "John",
  "age": 28,
  "skills": [
    "HTML",
    "CSS",
    "JavaScript"
  ],
  "address": {
    "city": "New York",
    "country": "USA"
  }
}
How to format JSON online
- 1. Copy your JSON data.
- 2. Open the DigitalDevTools JSON Formatter.
- 3. Paste your JSON into the editor.
- 4. Format the JSON to make the structure easier to read.
Try the JSON Formatter
Need to quickly format JSON while working on an API or web project? Try the free DigitalDevTools JSON Formatter directly in your browser.
Format JSON Online →A JSON formatter is one of those small developer tools that can save a surprising amount of time. Instead of manually adding spaces and indentation, you can format JSON in seconds and get back to debugging or building your application.
2. Chrome DevTools
If you build websites, Chrome DevTools is one of the most useful tools you can have. It is built directly into Google Chrome, so there is nothing extra to install.
Chrome DevTools lets you inspect HTML and CSS, debug JavaScript, test responsive layouts, check network requests, and investigate website performance. It is useful for both beginners who are learning web development and experienced developers working on production websites.
What can you do with Chrome DevTools?
- ✓Inspect and modify HTML elements
- ✓Experiment with CSS directly in the browser
- ✓Debug JavaScript errors and warnings
- ✓Test websites on different screen sizes
- ✓Inspect network requests and loaded resources
- ✓Investigate website performance issues
Test responsive designs
One of the most useful features for frontend developers is the device toolbar. It allows you to preview a website at different screen sizes without physically switching devices.
You can use it to test common mobile, tablet, and desktop viewport sizes and quickly find layout problems such as overflowing content, incorrect spacing, or elements that do not fit on smaller screens.
Inspect and experiment with CSS
Chrome DevTools is also a great way to learn how CSS works. You can select an element on a page, inspect its styles, and temporarily change properties such as padding, margin, width, colors, fonts, and borders.
These changes are temporary, so you can experiment freely without changing the original website files. Once you find the right CSS, you can apply the changes to your project.
How to open Chrome DevTools
You can open Chrome DevTools by right-clicking anywhere on a webpage and selecting Inspect. You can also use the keyboard shortcut:
Windows / Linux: Ctrl + Shift + I
macOS: Command + Option + I
Once DevTools is open, take some time to explore the Elements, Console, Network, and Lighthouse-related tools. You do not need to learn everything at once. Start with the features you use most often and expand your knowledge as your projects become more complex.
Best for
Frontend development, debugging, responsive design testing, CSS experimentation, and website performance investigation.
3. Code to Image
Sharing code is a common part of a developer's workflow. You might want to share a useful snippet on social media, add code to a tutorial, create a presentation, or include a clean code example in documentation.
Instead of taking a screenshot of your entire code editor, a code to image tool lets you turn your code into a clean, professional-looking image. This makes the code easier to present and gives you more control over how the final image looks.
Why convert code to an image?
- ✓Create cleaner code screenshots
- ✓Share code snippets on social media
- ✓Create visuals for programming tutorials
- ✓Add attractive code examples to presentations
- ✓Share code without showing your entire editor
Code screenshot vs code to image
A normal screenshot captures everything visible on your screen, including your editor, tabs, sidebars, and other parts of your desktop. That can make a code example look cluttered.
A dedicated code to image tool focuses on the code itself. You can create a compact visual that is easier to share and understand.
How to convert code to an image
- 1. Copy the code you want to share.
- 2. Open the DigitalDevTools Code to Image tool.
- 3. Paste your code into the editor.
- 4. Select the appropriate programming language and customize the appearance if needed.
- 5. Export the code as an image.
Create a code image online
Turn your HTML, CSS, JavaScript, React, and other code snippets into clean images directly from your browser with DigitalDevTools.
Convert Code to Image →Where can you use code images?
Code images can be useful in many situations. Developers can use them for technical blog posts, tutorials, presentations, documentation, course materials, social media posts, and project announcements.
They are especially useful when the goal is to show a short code example rather than provide a complete code file for someone to copy.
Best for
Code screenshots, developer tutorials, technical content, presentations, documentation, and sharing programming snippets online.
4. PageSpeed Insights
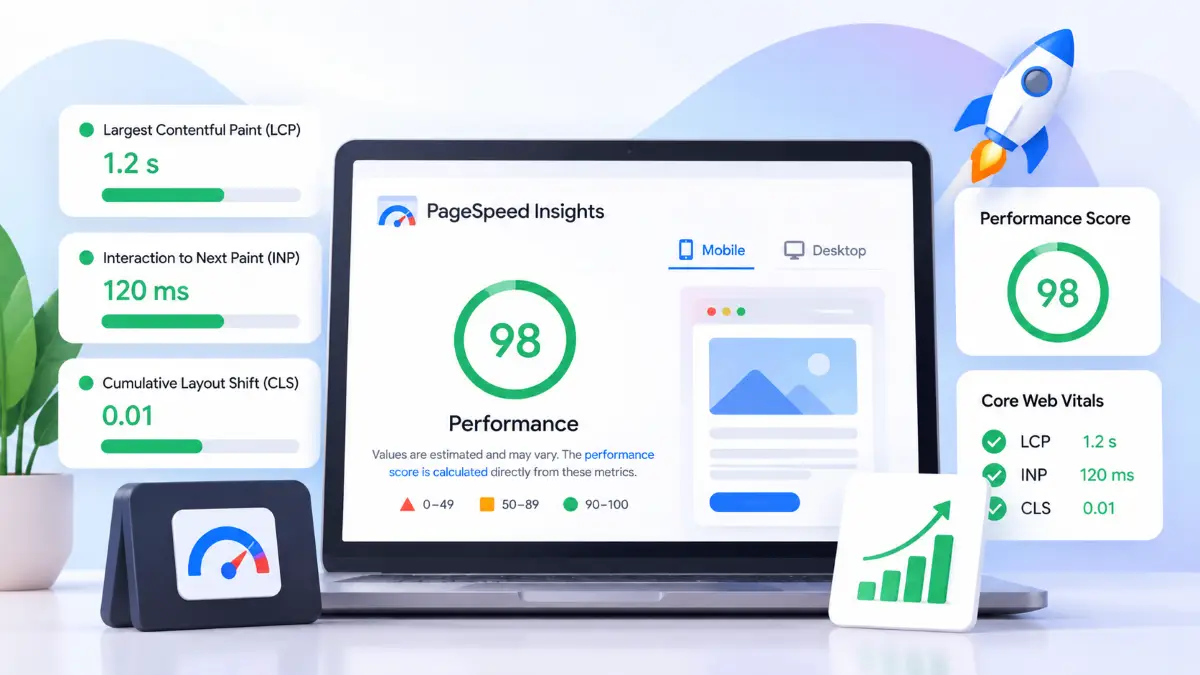
A website can look great and still feel slow to visitors. PageSpeed Insights is a free tool from Google that helps developers understand how a webpage performs and what can be improved.
You simply enter a webpage URL, and the tool analyzes the page and provides performance information along with suggestions for improving the experience for your visitors.
What can PageSpeed Insights help you check?
- ✓Website loading performance
- ✓Performance on mobile and desktop
- ✓Core Web Vitals and user experience signals
- ✓Large or inefficient resources
- ✓Potential opportunities for performance improvements
Why website performance matters
People generally expect websites to respond quickly. A page that takes too long to load can create a poor experience, especially for visitors using mobile devices or slower connections.
Performance is also an important part of building a high-quality website. Developers should look beyond a single performance score and use the report to identify specific problems that can be fixed.
How to test a website with PageSpeed Insights
- 1. Open PageSpeed Insights.
- 2. Enter the URL of the webpage you want to analyze.
- 3. Start the analysis.
- 4. Review the performance results and recommendations.
- 5. Fix the highest-impact issues and test the page again.
Tip: Don't ignore your images
Large image files are a common reason for unnecessary page weight. Compressing images and using appropriate image formats can help reduce the amount of data a browser needs to download.
Compress Images Online →PageSpeed Insights is particularly useful after you have made changes to a website. Instead of guessing whether a page became faster, you can use performance data to identify areas that still need attention.
Best for
Website performance testing, Core Web Vitals, identifying performance issues, and finding opportunities to improve page speed.
5. CodePen
Sometimes you want to test a small piece of HTML, CSS, or JavaScript without creating a complete project. CodePen is a popular online code editor that makes this easy.
Instead of setting up a project, installing dependencies, and creating multiple files, you can open a browser, write your code, and immediately see the result. This makes CodePen useful for learning, experimenting, and creating small frontend prototypes.
What can you build with CodePen?
- ✓Test HTML and CSS ideas quickly
- ✓Experiment with JavaScript
- ✓Create small frontend prototypes
- ✓Practice frontend development
- ✓Share small web experiments with others
Why CodePen is useful for developers
Setting up a full development environment is not always necessary for a small experiment. If you want to test a CSS animation, try a button design, experiment with a layout, or check a JavaScript idea, an online editor can save time.
CodePen also makes it easy to separate HTML, CSS, and JavaScript while seeing the output in real time. This makes it especially helpful for beginners who are learning how these technologies work together.
CodePen for learning frontend development
Beginners can use CodePen to experiment without worrying about project setup. You can start with a simple HTML element, add some CSS, and then introduce JavaScript as your project becomes more interactive.
It is also useful when following a tutorial because you can quickly test a small code example and see exactly what it does in the browser.
A good tool for quick experiments
CodePen is not intended to replace a full development environment for large applications. Instead, think of it as a convenient place to test ideas, learn frontend technologies, and build small interactive examples.
Visit CodePen →Best for
Frontend experiments, HTML and CSS practice, JavaScript testing, prototypes, tutorials, and learning web development.
6. Image Compressor
Images are an important part of modern websites, but large image files can increase page size and make websites take longer to load. An image compressor can reduce the file size of an image while keeping its visual quality at a useful level.
Image compression is useful for developers, designers, bloggers, and website owners who want to optimize images before adding them to a website. It can also be useful when an application or online form has a maximum file size requirement.
Why should developers compress images?
- ✓Reduce the size of website assets
- ✓Improve page loading performance
- ✓Use less bandwidth when images are downloaded
- ✓Make large images easier to upload and share
- ✓Meet file-size limits for websites and online forms
Image compression vs image resizing
Image compression and image resizing are related, but they are not the same thing.
Compression primarily reduces the amount of data stored in an image file. Resizing changes the image dimensions, such as reducing an image from 4000 × 3000 pixels to 1600 × 1200 pixels.
Depending on the image and its intended use, you may need one or both. For example, a large photograph used on a blog may benefit from being resized and compressed before it is uploaded.
JPG, PNG, or WebP?
The image format you choose can also affect file size. JPG is commonly used for photographs, PNG is useful when you need features such as transparency or lossless image data, and WebP is a modern format that can provide efficient compression for many types of web images.
The best format depends on the image and how you plan to use it. Before uploading images to a website, check both the visual quality and the final file size.
How to compress an image online
- 1. Select the image you want to optimize.
- 2. Open the DigitalDevTools Image Compressor.
- 3. Upload your image.
- 4. Choose the appropriate output format or compression settings.
- 5. Compare the original and compressed file sizes.
- 6. Download the optimized image when you are satisfied with the result.
Compress images online with DigitalDevTools
Reduce image file sizes directly in your browser. DigitalDevTools makes it easy to compress images before using them on websites, applications, blogs, or online forms.
Compress Image Online →When should you compress images?
A good time to compress an image is before uploading it to your website. This is particularly important for large photographs, hero images, blog images, product images, and other assets that visitors need to download.
Compressing images before they reach your production website can help keep your page assets smaller and make image optimization part of your normal development workflow.
Best for
Website image optimization, reducing image file size, improving page performance, preparing images for uploads, and optimizing images for blogs and web applications.
7. Can I Use
Web browsers do not always support every HTML, CSS, and JavaScript feature in exactly the same way. Before using a newer web feature in a project, developers often need to check whether it works across the browsers their users are likely to use.
Can I Use is a popular browser compatibility reference that helps developers check support for web platform features across different browsers and browser versions.
What can you check with Can I Use?
- ✓HTML feature browser support
- ✓CSS property and feature support
- ✓JavaScript API support
- ✓Support across major desktop browsers
- ✓Support across major mobile browsers
Why browser compatibility matters
A feature may work perfectly in the browser you use during development but behave differently or have limited support in another browser. Checking compatibility before building around a feature can help you avoid unexpected problems later.
This is particularly useful when working with newer CSS features, browser APIs, HTML features, or JavaScript functionality that may not have uniform support across all browsers.
How to check browser support
- 1. Open the Can I Use website.
- 2. Search for the HTML, CSS, or JavaScript feature you want to use.
- 3. Review the browser support information.
- 4. Check whether the feature meets the browser requirements of your project.
A useful habit for developers
You do not need to check every CSS property or JavaScript feature before using it. But when you are working with a newer or unfamiliar web feature, checking browser compatibility can prevent unnecessary debugging later.
Check Browser Support →Can I Use is especially helpful when your website needs to work across a wide range of browsers. It gives you a quick way to make an informed decision before relying on a particular web platform feature.
Best for
Checking HTML, CSS, and JavaScript browser compatibility before using web platform features in a project.
8. 100 CSS Shadows
Adding a good shadow can make a website feel more polished and give cards, buttons, images, and other elements more visual depth. But creating the right CSS box shadow from scratch can take some experimentation.
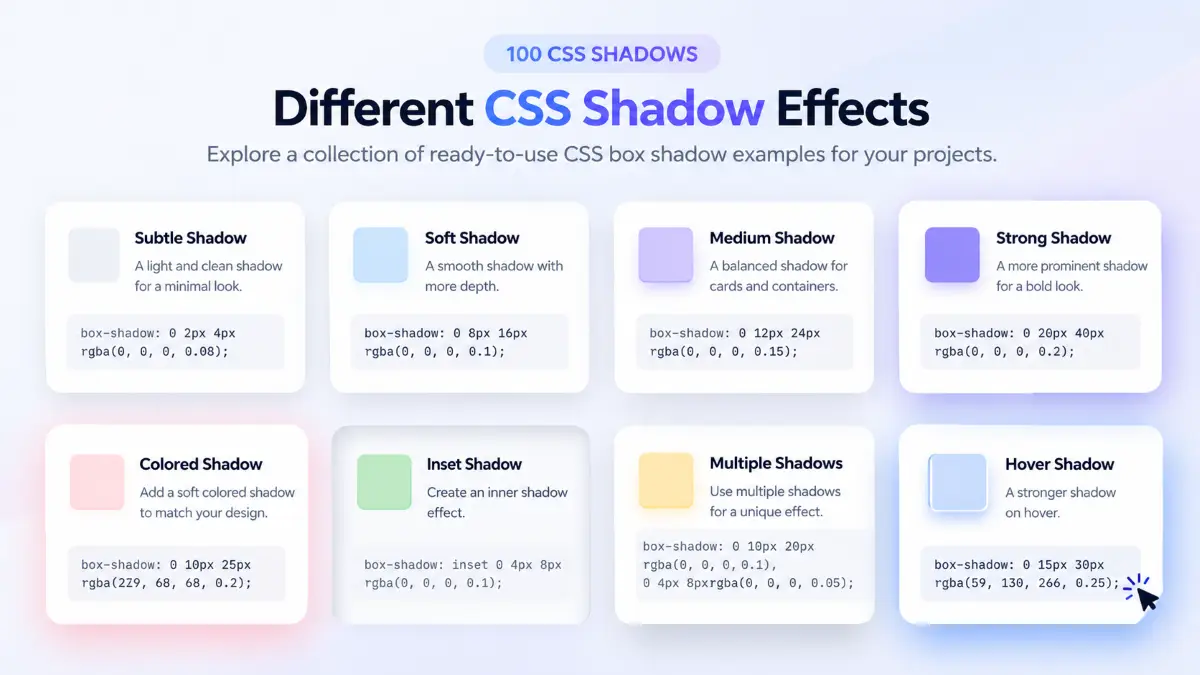
100 CSS Shadows gives you a collection of ready-to-use CSS shadow examples that you can browse, copy, and use in your own projects. It is especially useful when you want a quick starting point instead of manually adjusting every shadow value.
Why use CSS shadows?
The CSS box-shadowproperty lets you add shadows around HTML elements. With different offset, blur, spread, and color values, you can create anything from a subtle shadow to a stronger visual effect.
- ✓ Add depth to cards and containers
- ✓ Create subtle shadows for modern UI designs
- ✓ Improve buttons and interactive elements
- ✓ Create different CSS shadow effects
- ✓ Get ready-to-use box-shadow CSS values
What can you create with CSS box-shadow?
CSS shadows are useful for many common UI components. You can use them on cards, navigation elements, buttons, modals, input fields, images, and other containers.
Card Shadows
Give cards a subtle layer of depth without making the design look heavy.
Button Shadows
Add depth to buttons and make important actions stand out.
UI Elements
Use shadows on menus, inputs, modals, and other interface components.
Image Effects
Add a simple shadow around images to separate them from the background.
How to use a CSS shadow
- Choose a shadow style you like.
- Copy the provided CSS code.
- Paste the
box-shadowproperty into your CSS. - Adjust the color or shadow values if you want to customize it.
- Preview the result in your project.
Try 100 CSS Shadows
Looking for a quick CSS shadow generator or ready-made shadow styles? Browse the collection, find a shadow that fits your design, and copy the CSS you need.
Explore CSS Shadows →You do not always need a complicated shadow to improve a design. In many cases, a small amount of blur and transparency is enough to create a clean, modern look. Using ready-made CSS shadow examplescan help you experiment faster and understand how differentbox-shadowvalues affect the final result.
Best for
Frontend developers, UI designers, students, and anyone looking for ready-to-use CSS shadows and box-shadow CSS examples.
9. Regex101
Regular expressions, or regex, are useful when you need to find, validate, extract, or replace specific patterns in text. They are powerful, but writing a regular expression from scratch can be difficult, especially when you are still learning the syntax.
Regex101 is an online regex testing tool that lets you write a pattern, test it against sample text, and see the matches immediately. It is useful for debugging regular expressions before using them in your application.
Why use an online regex tester?
A regular expression can look correct at first glance but still produce unexpected results. Testing it against real examples makes it much easier to find mistakes and understand exactly what your pattern is matching.
- ✓ Test regular expressions against sample text
- ✓ See matching text highlighted immediately
- ✓ Debug and refine regex patterns
- ✓ Experiment with different regex syntax
- ✓ Learn how regular expressions work through practical examples
Common uses for regular expressions
Regex can be useful for many everyday development tasks. For example, you can use it to find specific words, validate a particular text format, extract information from a larger string, or replace matching patterns.
Text Validation
Check whether text follows a particular pattern or format.
Find & Extract
Find matching values or extract specific information from text.
Text Replacement
Identify matching patterns before replacing or transforming text.
Regex Learning
Experiment with patterns and understand why a regular expression matches particular text.
How to test a regular expression
- Open Regex101 in your browser.
- Enter your regular expression in the pattern field.
- Paste or type some sample text to test.
- Review the highlighted matches and any errors.
- Adjust the pattern until it produces the expected result.
Try Regex101
If you are working with regular expressions, an online regex tester can save time by letting you test your pattern before adding it to your application.
Test Regex Online →Regex can become much easier to work with once you test patterns interactively. Instead of repeatedly changing code and running your application, you can use a regex tester online to experiment with your pattern first.
Best for
Web developers, backend developers, data-processing tasks, students, and anyone who needs to create, test, or debug regular expressions.
10. WebAIM Contrast Checker
Good web design is not only about colors that look attractive. Text also needs enough contrast against its background so that people can read it comfortably. This becomes especially important for users with visual impairments or difficulty distinguishing certain colors.
The WebAIM Contrast Checker is a free online accessibility tool that helps you check the contrast between foreground and background colors. It can tell you whether a color combination meets commonly used accessibility contrast requirements.
Why does color contrast matter?
A color combination may look fine on your monitor but still be difficult for other people to read. For example, light gray text on a white background can look modern while providing poor readability.
Checking contrast during development helps you catch these problems before they reach your users.
- ✓ Check text and background color combinations
- ✓ Check contrast ratios for accessibility
- ✓ Test normal and large text
- ✓ Improve readability of your website
- ✓ Catch potential color accessibility problems early
How to check color contrast
- Choose the foreground color used for your text or interface element.
- Choose the background color behind it.
- Enter both colors into the contrast checker.
- Review the calculated contrast ratio and accessibility results.
- Adjust your colors if the combination does not provide enough contrast.
Try the WebAIM Contrast Checker
Before publishing a website, test important text and interface colors with a color contrast checker. It is a simple step that can help improve both accessibility and readability.
Check Color Contrast →Where should you check contrast?
You do not have to check every color in a website individually. Start with the colors users interact with or read most often.
- ✓ Body text and page backgrounds
- ✓ Headings and important information
- ✓ Buttons and call-to-action elements
- ✓ Form labels and input text
- ✓ Navigation links and other important UI elements
Color contrast is just one part of building an accessible website, but it is an easy area to test during development. Adding a quick contrast check to your workflow can help you create interfaces that are easier for more people to use.
Best for
Frontend developers, UI designers, accessibility-focused developers, students, and anyone who wants to improve website readability and accessibility.
How to Choose the Right Web Development Tool
There are hundreds of web development tools available online, but you do not need to use all of them. The best tool depends on what you are trying to accomplish.
A good developer usually keeps a small collection of reliable tools for common tasks such as debugging, testing, formatting, optimizing, and experimenting with code.
1. Choose a tool based on the task
Start by identifying the problem you need to solve. For example, if you have messy JSON, you need a JSON formatter. If your website is slow, a performance testing tool is more useful than a code editor.
| Your Task | Useful Tool |
|---|---|
| Format or inspect JSON | JSON Formatter |
| Debug a website | Chrome DevTools |
| Create a code screenshot | Code to Image |
| Test website performance | PageSpeed Insights |
| Experiment with HTML, CSS, and JavaScript | CodePen |
| Compress images | Image Compressor |
| Check browser support | Can I Use |
| Find a CSS shadow | 100 CSS Shadows |
| Test a regular expression | Regex101 |
| Check color accessibility | WebAIM Contrast Checker |
2. Check whether the tool is actually free
Many online developer tools offer a free version, but some put important features behind a paid plan. Before making a tool part of your workflow, check what is included in the free version and whether it has limits on usage, file size, or other features.
3. Prefer simple tools for simple problems
You do not always need a large application to solve a small development problem. An online developer tool can often save time when you only need to format some data, test a pattern, check a browser feature, or optimize an image.
4. Consider privacy before uploading data
Be careful when using online tools with private or sensitive information. Avoid uploading passwords, API keys, customer information, private source code, confidential documents, or other sensitive data unless you understand how the service handles your information.
5. Keep your development toolkit focused
A useful collection of free developer tools should make your workflow faster, not more complicated. Keep the tools that you use regularly and avoid collecting tools simply because they are available.
A simple rule for choosing tools
Choose the simplest reliable tool that solves the problem, fits your workflow, and handles your data appropriately. You can always move to a more advanced solution when your requirements grow.